Showing posts sorted by relevance for query tarn. Sort by date Show all posts

Thursday, September 2, 2010

From Old T-Shirts To New Hot Pads


Last weekend when we stopped by my in-law's place, they were packing up to move.  While going through their things, my mother-in-law came across some old shirts that she would no longer wear due to stains.  So she gave them to me to craft with.  Today I went through them and found 3 that were suitable for making tarn (t-shirt yarn) out of.  In the end, only 2 were tarn worthy.  The middle one's print took up to much of the shirt, and thus would not give me enough tarn.  I'm going to making something else out of that one.


Here are my 2 skeins of gray tarn.  I know a lot of people like colorful tarn, but I actually like gray tarn.  Maybe its because gray shirts have usually been really comfortable for me to wear that the tarn makes me feel comfortable.


I was able to make these 4 flower hot pads from those 2 skeins.  I followed Cindy's pattern found here.  The first one (upper left) has one to many petals.  I finally figured out how to get the desired 7 petals after that.  The small one (lower left) only used 4 out of the 5 rounds, because I ran out of tarn.  My favorite is the lower right one, because it uses two colors in it.  I'm feeling pretty productive today.  What is really nice about Cindy's pattern is that it uses one skein of tarn (which can be hard to come by at times) and they make the perfect hot pad.

Tuesday, December 29, 2009

How to make Tarn (t-shirt yarn)


Lay out your shirt. One with little to no printing on it is preferable.
The printing sits on the surface of the material and thus makes it harder to work with as tarn.


Cut from arm pit to arm pit and cut off the bottom seam.
Save these parts for another project.
If there is printing below the arm pits, then cut off that to.


Fold shirt from side to side leaving about a half an inch of a single layer exposed.

I like to use a ruler and a rotary cuter to cut my tarn. Cut 1/2" or more leaving about a 1/2" uncut on one side. The smaller the width cut, the thinner the yarn, and the more yardage.
You can just use your scissors and cut around and around in a continuous circle. It takes a little longer, but it works.


This is what it will look like after you finish cutting.
Notice the uncut side?

Now open the shirt up so that the uncut section is visible.

Cut one piece to get it started.

Then cut from the next cut line to the next cut line on the other side.
Keep cutting in this manner.
It will make a continuous strip of material.

Now give a little tug (with both hands) to stretch it.
The sides will curl in.
Do this to the entire length of material.

I recently bought a ball winder, however you can just make your own ball. Its easy to do.

The 2 on the outside were cut at a 1/2" width.
The one in the center was cut at an inch width.
If you have a lot of white shirts, you can dye them before cutting them to make more colorful tarn.

I am apart of a RAL (rug-a-long) in the Trash to Treasures Ravelry group (link on the right side of my blog). I am making my rug out of tarn. I crochet 8 stitches into a ring, and then increased as normal to keep it flat. I am using a size J hook.
Pattern:
8 st in magic loop
R2: 2 sc in each chain = 16 sts
R3: (2 sc in chain, 1 sc in chain) repeat = 24 sts
R4: ( 2 sc in chain, 2 sc in chain) repeat = 32 sts
R5: (2 sc in chain, 3 sc in chain) repeat = 40 sts
* Just at the number of sc (single crochet) for each row.*
The total number of stitches is a multiple of the number that went into the magic loop. In this case it is a multiple of 8.

Monday, January 4, 2010

Day 4 of the challenge: Tarn Rug & Hot Pad

Here is my tarn rug as of last night. The peach is the beginning. Right now there is also another white stripe followed by a grey stripe. I also made 3 more skeins of tarn today. All of the grey tarn are from a place that my mom and I use to work at. The black shirt was from a dance studio that I use to attend. When this was taken last night, it was 12" long and 34" wide.

I made this tarn hot pad very quickly last night. I had cut the skein a year ago, so it was to thick for the rug. I single crochet 10 stitches in the the loop to get it started. It is supper thick.

Saturday, February 13, 2010

Its Easy Being Green Episode 13: Crafting with T-shirts


The episode of "Its Easy Being Green" that airs tonight is about crafting with t-shirts. There are several things that you can make out of an old t-shirt. You might recall one of the first episodes was about quilting. I had showed how to make a Grandmother's Flower Garden style quilt out of t-shirts. Here is the blog link about it, and here is part one of the 3 part video from the show. There are other t-shirt quilts out there as well. Because t-shirts are so stretchy, you might want to starch them or use a template before piecing them together.

Next I showed how to make tarn or t-shirt yarn. You can see this how to on a past blog post. Here is a set of blogs posts that I have made about making and using tarn. You can also check out Cindy's blog at myrecycledbags.com for other tarn projects. She gives patterns for different things including a baby bib and items for your kitchen. Here is also a google image search for t-shirt yarn. Here is a list of tarn projects on ravelry.

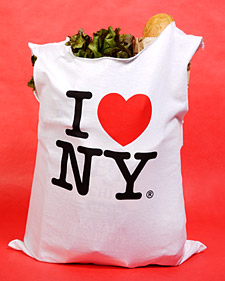
The next item shown on this episode was how to make a reusable shopping bag / an easy tote bag out of a t-shirt. You might have seen this on the Martha Stewart show. You cut off the sleeves and the collar of the shirt. Turn it inside out and sew the bottom closed. Turn it right sides out and now you have a bag. Where the sleeves were are now the handles.

After that I showed how to make 5 bags out of 1 t-shirt. You can see my blog post on this here. You can also see a video how to at Fake Plastic Fish's blog. These bags are perfect for your produce instead of those plastic produce bags. The sleeve bags are good for carrying money, jewelry, and snacks in. The drawstring bags made from the bottom half of the shirt are also good for toys, gifts, and craft projects.

I was only able to explain how to make a lined tote bag out of a t-shirt on the show. Here is the step by step on how to make it.

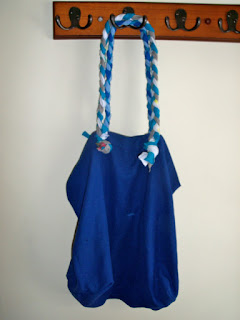
Here is the tote bag that I made from a Friendly's work shirt. You used the bottom of the shirt for the top of the bag, because it already has a finished edge. You cut it from arm pit to arm pit and use the bottom half for the bag. Turn it inside out and sew the cut edges together, then sew the corners so that the bag lays flat when filled. For the handles I braided the bottom seams of several shirts together, then just sewed them on.

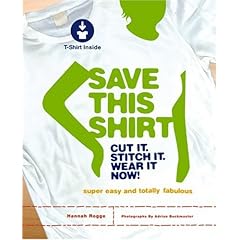
There are several books out there on different things to make out of a t-shirt. I own "Save This Shirt: Cut It. Stitch It. Wear It Now!" by Hannah Rogge. You can also visit the ravelry group Trash to Treasure's t-shirt thread for other ideas. One item that I found really cute was making a ruffled skirt out of a few old t-shirts. You could also make a t-shirt shrug, add some lace to the shirt's neck line, and much much more. Many people also use really old shirts as rags for cleaning their home and car.

One of my favorite resources for how tos on re purposing your t-shirts is Thread Banger. They also have a you tube channel and a vid-cast / podcast. I subscribe to both.

Also if you are looking for some fun and unique t-shirts to wear, checkout Threadless. I am wearing one of their shirts in this episode.

This episode of my show will be on my you tube channel in 2 weeks. The link for my you tube channel, textiles4you, is in the upper right hand side of my blog.

Saturday, September 4, 2010

Tarn


I figured out what I am going to make my grandma for Christmas.  A tarn (t-shirt yarn) walker tote.  The pattern is by Cindy at myrecyclebags.com.  Her current walker bag is a little to light for her liking, and she would like something with more weight to it.  The first t-shirt that I cut was not good.  I forgot that shirts with side seams do not make good tarn.  I have 4 shirts that are tarn worthy, the light blue above, light gray, a medium gray (below), and black.  The tote is going to be mainly light blue because that was an extra large t-shirt thus it has more yardage.  I am thinking that the black is to bold, so I might use the medium gray as a stripe.


Last night I started a new project that will be a Christmas present for my mom.  I won't be posting any pictures of it until after Christmas though.  Both of these Christmas presents fit into Stash Busting September.

Sunday, August 15, 2010

Cupcake Pincushion & Tarn Hot Pad


Here is a cute little bottle cap pincushion that I made last night. My idea was to make a red with white dot mushroom, but it looks more like a cupcake.  I'm thinking of making a whole bunch of cupcake pincushions.  They are so cute.


I just used white embroidery floss to make the white dots.


Yesterday I was thrilled to see that Cindy from myrecycledbags.com posted a pattern for a tarn (t-shirt yarn) trivet / hot pad.  I made a tarn hod pad a few months ago and I love it.  Its my favorite hot pad.  So after seeing Cindy's pattern for a flower hod pad, I ran to my craft t-shirt bin and searched for a shirt to cut up and make tarn out of.  I could only find a white shirt.  The shirt could have been dyed first, but I just wanted to try out the pattern.  It took me 15 to 30 minutes to make this quick and easy pattern.  I used an I hook instead of the J hook that the pattern called for, because I just couldn't find my J hook.  


For some reason the camera just didn't want to take a good picture of the white hot pad.  It seems that white and red are hard to photograph.  However you can see a beautiful blue one on Cindy's blog.

Sunday, September 5, 2010

Tarn Walker Bag


During the summer I visited my grandma for a few days (she lives far from me).  She uses a walker and a walker bag (for the phone, remote, etc.).  She said that her walker bag was to light weight for her.  She wanted something with more weight to it.  Thats when I said a silent thank you to Cindy from myrecycle bags.com  for creating a wonderful walker bag pattern.  Her pattern calls for 2 skeins of tarn (t-shirt yarn).  I ended up using 3 skeins, because 2 of my skeins were from children's shirts.  The light blue tarn was from an extra large shirt.  This is a very easy and fast pattern to crochet.  The only real change that I made was chaining 2 stitches for the button hole instead of one.  The buttons also came from my stash (thankfully I had some blue ones).  I love this bag!  It is so pretty, and it is a nice size.  I'm going to give it to my grandma for Christmas.  I hope that she likes it.


Sunday, February 28, 2010

Brooks Free Library Class


Yesterday I drove 2 hours to the Brooks Free Library in Harwich, MA (along Cape Cod) to teach an adult class. Seventeen ladies came to the class, which just made my day. The first thing that I showed them how to make was plarn / plastic bag yarn. Click here to see a past post on crafting with plastic bags. It has links to the written and visual instructions.

Next I showed them how to make tarn / t-shirt yarn. Click here for a past post on how to make tarn. I will be uploading 3 you tube videos this week on how to make yarn and bags out of t-shirts. Here is a link to my you tube channel. The ladies were pleasantly surprised at how much yardage of yarn that you can get out of a single t-shirt. If making the yarn the way that I showed is to hard, then you can cut it in a spiral around the shirt instead. Also you can find fun tarn patterns at myrecycledbags.com.

Next we made plastic bag wreaths. Click here to see the you tube video on how to make a plastic bag wreath. You can also refer to this past blog post as well.

Everyone had a good time in the class. I really enjoying spreading the love of eco-crafting. I am happy to say that they want to see me again this summer. If anyone has any questions about this class, please leave me a comment here.

Friday, August 20, 2010

Smaller Flower Tarn Hot Pad


While digging through things in my studio I found a ball of tarn (t-shirt yarn).  I really wanted to make another flower hot pad by Cindy at My Recycled Bags.  There are 5 rounds to this pattern, but I could only complete 4 rounds before I ran out of tarn.  So this one is smaller than my other one, but it is still cute.


I linked this project along with a few other to Vision of Sugar Plum's Fibers on Friday.

Saturday, January 16, 2010

Day 16 of Craft Challenge

I made more tarn / t-shirt yarn from 4 t-shirts tonight.

I crochet more on my tarn rug.
I just needed to make more tarn, thus the mini break from it.
I'm thinking of crocheting around all 4 sides when its about the length that I want it.

I've started crocheting another bag from the spun & plied plarn & boa yarn.
The plarn is white this time around and the bag is smaller than the last one.
I just finished crocheting the bottom of the bag last night.

I entered a contest in the Yarn Craft ravelry group this month and won this Lion Brand yarn! It is super soft! Now to figure out what to make out of it.

Ok, so this kind of looks like crap. I know. It was part of a bash your holiday trash challenge. I had to use at least 3 of the items on the list that was given. This was more like an experiment. I shredded some used wrapping paper. Then added some glue to both sides of a cd and dipped it in the bag of shredded paper. I glued a bottle cap to the center and drew a snow flake on it. The hanger is twisted used wrapping paper. The front and the back are the same.

Sunday, January 3, 2010

Day 3 of this Eco-Craft Challenge

Sorry, no pictures today. I have been working on a crochet version of the the ornament that I knitted yesterday. There is no crochet pattern for it, so I've been figuring one out. I also made 3 more skeins of tarn. I'm crocheting more of my tarn rug tonight.

Saturday, January 23, 2010

20 items made from 4 t-shirts

Yesterday I watched a video on Fake Plastic Fish's blog. She had filmed someone showing how you can make 5 or 6 produce bags out of a single t-shirt. I was inspired.

I had 4 t-shirts that I wanted to craft with today. Three of them I made tarn / t-shirt yarn out of. These will be used in my tarn rug.

Then I made 1 large, 2 medium, and 9 small drawstring bags. All of the small bags were made out of t-shirt sleeves. The purple sleeves were shaped funny, so I sewed the 2 sleeves together. I then made 3 bags out of it. Two of the bags can hold a piece of jewelry (gift bag). The larger bags were made from the bottom half of the shirts (below the armpits). The purple ones were made by cutting that section in half. The bottom of the shirts became the top of the bags, because of the already finished hem.

These may seem like folded shirts, but they are all small bags. These were the top half of the shirts with the sleeves cut off. I hemmed the sides first. Then I sewed 3 of the sides together, leaving a 3" gap at the top 2 sides. These are the handles.

This is the smallest of the 5 bags. This is one way to carry an object in it. It would be good for vegetables that you only buy one or two of.

Here it is open. I'm looking forward to taking my new produce bags to the grocery store. Now I have enough reusable produce bags that I don't need to use the plastic ones again. You can also use them as grab bags for crafting on the go.