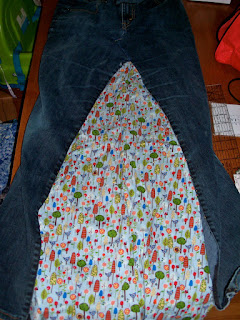
Picking out the right fabric for my jean skirt.



 For Valentine's Day my husband gave me a card and a box of chocolates (and a few other things). When I woke up this morning, I was inspired to turn them into a jewelry box. The only thing that I did not use from this picture was the envelope. The item to the bottom right is what covered the chocolate when you opened the box.
 First measure the bottom half of the box. Next you add a half an inch to your measurements for a quarter inch seam allowance.
 Next sew all 4 side panels of fabric to the center one. Then sew the corners together. Here is the box inserted into the fabric.
  I did not have any fabric glue on hand, but Elmer's works just as well. I applied glue to the inner bottom cracks and base of the box to keep the fabric in place.
  Next I glued the cushion insert to the bottom of the box. You could use fabric or another card for this, but I liked the way that this insert looked.
 Next I cut the card in half. I measured the top half of the box and cut each of the cards accordingly.
 Then I cut the fabric for the 4 sides panels. The measurements were the same as for the bottom half.
 You want to make your straight stitch longer when sewing through paper. You will sew the 4 fabric sides to the card, and then sew the corners.
 Next glue the other half of the card to the inside. Be aware of it's placement in relation to the card on the outside of the box.


 Valentine's Day is here and I would like to share what I have been making for this special day. This is a crochet heart made from 2 soda tabs. Using a size us 3 crochet hook (a very small hook) and some crochet thread, make some single crochet stitches around the top hole of one soda tab. Then over lap another soda tab so that the bottom holes are on top of each other but at an angle. Then crochet through the 2 layers of the bottom hole. Then crochet through the top hole of the 2nd soda tab. Slip stitch into the first soda tab. Then using a double crochet, go around the whole heart one more time, then bind off and weave in the ends.
 This cute little puppy with a heart rug is for my toddler. You can download the free pattern on ravelry. It's a easy pattern and can be made in one night.
 This sack boy is for my 10 year old who loves to play the Play Station 3 game Little Big Planet. Sack boy is the main character in the game. This will be the 3rd one that I have made for him. I call him the Ninja of Love. When using the pattern, you have to tweak the body and head because the pattern wasn't written very well. I will be posting my modified version of the pattern soon. To get the red band around the eyes, change the color in rows 20 - 28. He is wearing a soda tab heart bracelet, as a type of Valentine's. This time around I did not stuff the head as firmly as I normally do, thus the head is smaller than the other two that I've made. I also cut 5 straws in half and joined the 10 straw pieces together with 2 rubber bands to make the spine. The pattern calls for less straws which isn't enough to with stand him being played with.

